MA.Vision.Gauge – Computer Vision Asymmetric Spur Gear Measuring
EİMT İlk tanışma toplantısını yaptı!
23 Ekim 2019EİMT ikinci toplatısını yaptı!
19 Kasım 2019The inspection system includes hardware and software. A camera that is in the high-resolution monochrome camera, a single board computer to process image and software for implementation of the image. The representation figure of the vision measurement system is given in Figure.
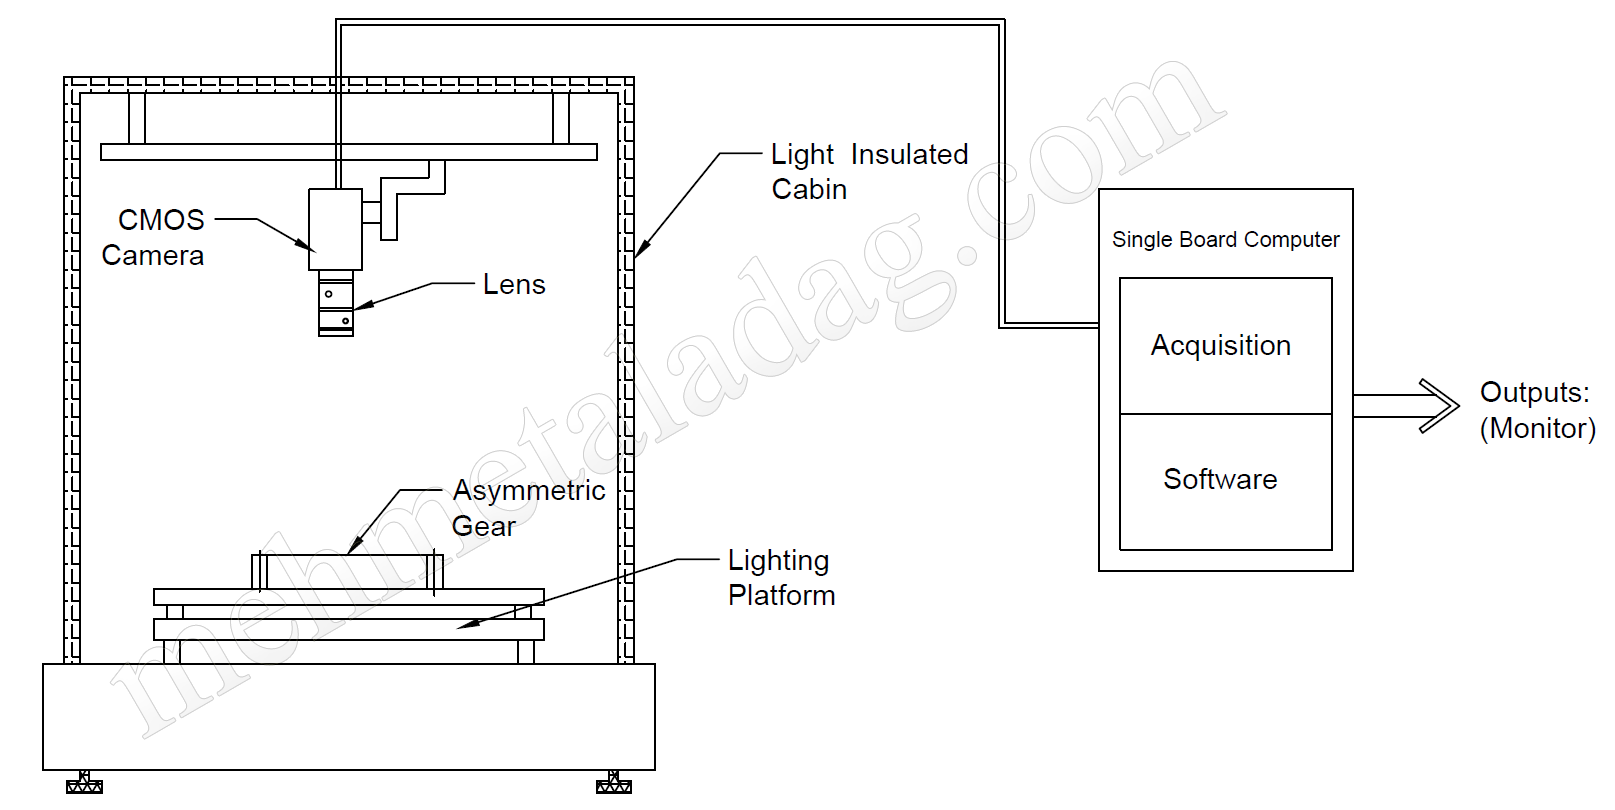
Image Processing Algorithm
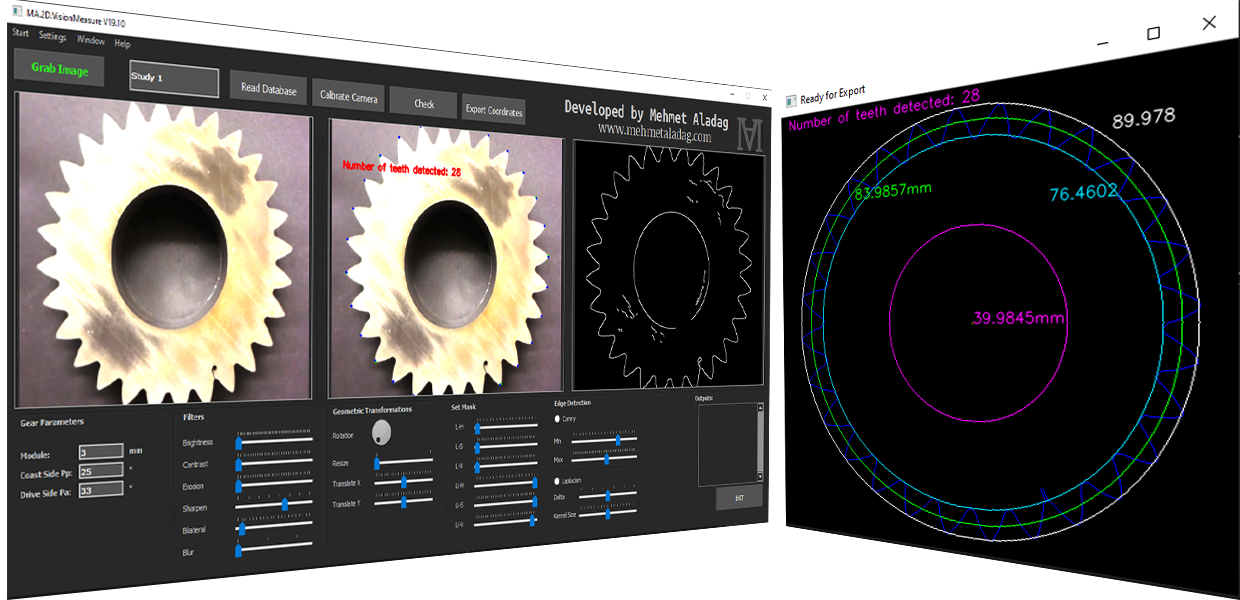
In short, the process starts with the opening of the gear image to be measured. If the opened image is colored, it is converted to a grayscale image. In here, the camera used in this study is monochrome camera, therefore, it is not required applying the gray filter. The gray image is converted to a binary image based on a calculated threshold. After the binary image is generated, an edge detection algorithm is applied to the binary image to remove edge pixels representing the boundaries of the threaded elements. The processing algorithm flowchart is given in figure 5. A thinning algorithm is then applied to the edge pixels to remove the extra pixels obtained by the edge detection algorithm. Figure 6 shows an exemplary gear image and it shows the extracted edge pixels obtained by the edge detection algorithm after applying the thinning algorithm.
In short, the process starts with the opening of the gear image to be measured. If the opened image is colored, it is converted to a grayscale image. In here, the camera used in this study is monochrome camera, therefore, it is not required applying the gray filter. The gray image is converted to a binary image based on a calculated threshold. After the binary image is generated, an edge detection algorithm is applied to the binary image to remove edge pixels representing the boundaries of the threaded elements. The processing algorithm flowchart is given in figure 5. A thinning algorithm is then applied to the edge pixels to remove the extra pixels obtained by the edge detection algorithm. Figure 6 shows an exemplary gear image and it shows the extracted edge pixels obtained by the edge detection algorithm after applying the thinning algorithm.

A labeling algorithm is then applied to the thinned image to mark each of the linked pixels with a unique label. In consequence, the outer contour which is representing the profile of the asymmetric spur gear teeth can be distinguished from other lines such as the shaft bore or the internal features. Once the outer contour is labeled, the pixels are subtracted and a sorting algorithm is applied to sort the pixels in order based on the distances between the two consecutive pixels.
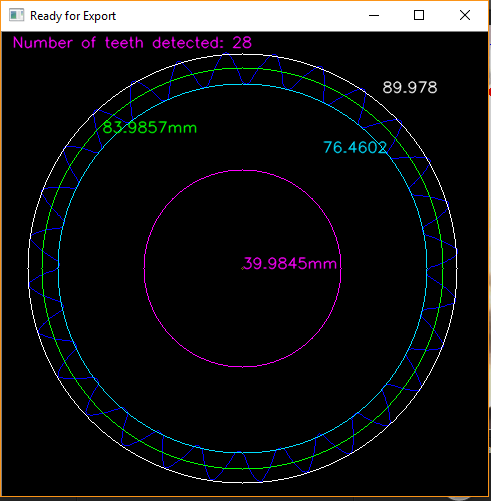
At this point, the coordinates (tooth profile) of the pixels that make up the outer profile of the gear are known and it is necessary to develop some computer vision algorithms that can use this data to measure spur gear parameters. It is well known that many of the gear parameters correlate with each other with known equations. For instance, the pitch circle diameter (Do) is associated with the number of teeth and the outer diameter (Da), while the module (m) is associated with the pitch circle diameter (Do) and the number of teeth (Z). In this case, three computer vision algorithms were developed to calculate the outer diameter, the root diameter and the number of teeth of the gears to be measured, then other gear parameters were calculated using equations based on these parameters. Each edge pixel in the image is then converted to a dot cloud. The obtained dot clouds are generated in the background, and X and Y coordinates are obtained in millimeters.
Results and Discussion
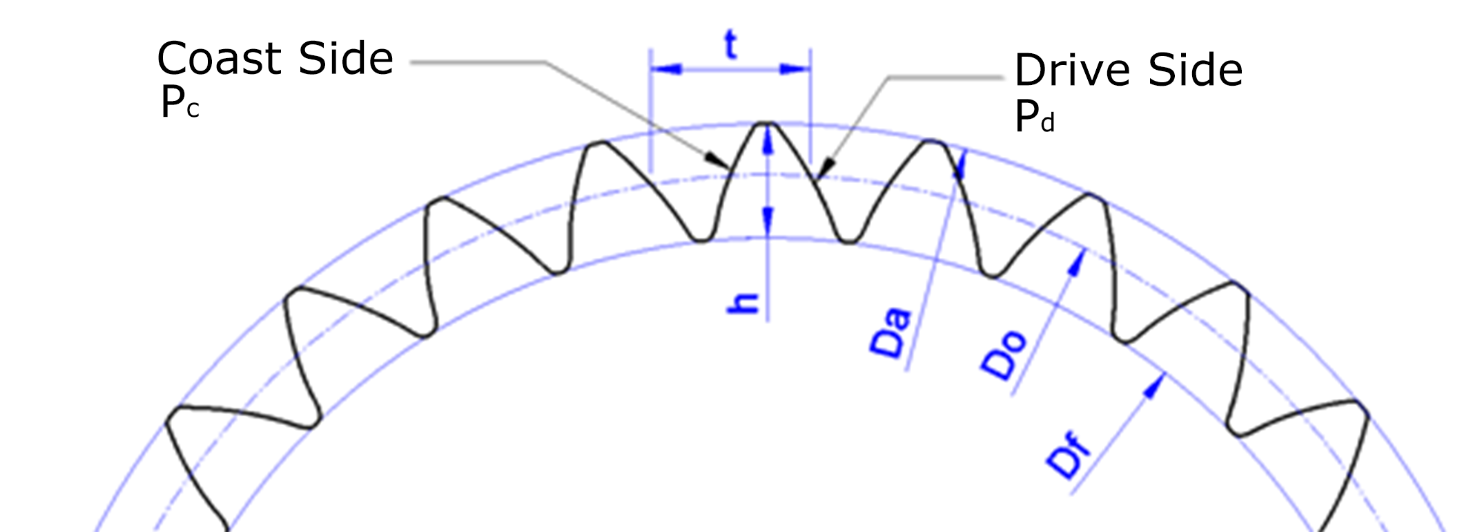
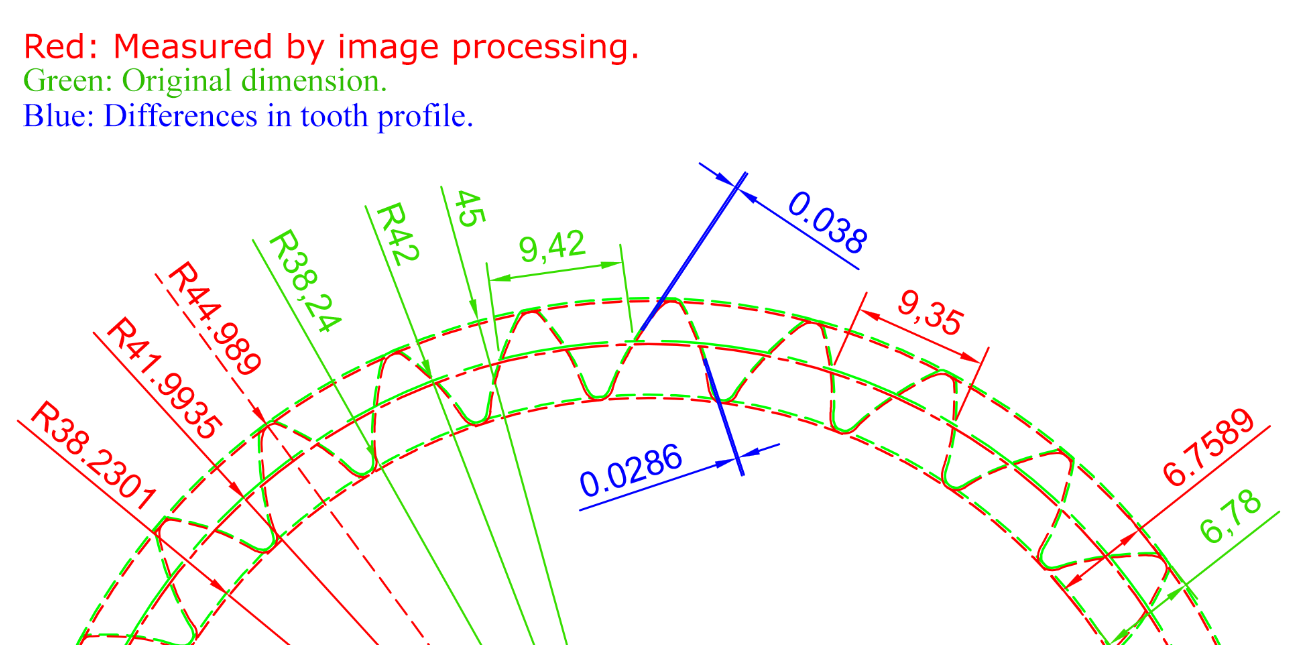
The obtained X and Y coordinates are processed in the Autocad program and a 2-dimensional scaled drawing of the asymmetric spur gear technical drawing is drawn. In the image processing application, the X and Y coordinates of the dot clouds obtained as a result of the application of the relevant parameters and filters are transferred to the Autocad environment and the gear drawing in Figure. It is dimensioned in different colors so that the differences can be easily distinguished. This is the drawing of the asymmetric spur gear with the required dimension which is drawn with green color in the drawing. The red one is the asymmetric spur gear measured at the end of the forging. The dimensioning is also colored accordingly. Shortening of the gear parameters and the required dimension expressions is also provided with the dimension; Dao, Doo, Dfo, to, and ho, respectively, are the original tooth diameter, the original circle diameter, the original tooth diameter, the original pitch and the original tooth height. Daf, Dof, Dff, tf and hf are the final tooth dimensions, the final section circle diameter, the final tooth diameter, the final pitch and the final tooth height. Finally, Paf and Ppf measurements are respectively the driven side profile error and the driven side profile curve.
The obtained X and Y coordinates are processed in the Autocad program and a 2-dimensional scaled drawing of the asymmetric spur gear technical drawing is drawn. In the image processing application, the X and Y coordinates of the dot clouds obtained as a result of the application of the relevant parameters and filters are transferred to the Autocad environment and the gear drawing in Figure. It is dimensioned in different colors so that the differences can be easily distinguished. This is the drawing of the asymmetric spur gear with the required dimension which is drawn with green color in the drawing. The red one is the asymmetric spur gear measured at the end of the forging. The dimensioning is also colored accordingly. Shortening of the gear parameters and the required dimension expressions is also provided with the dimension; Dao, Doo, Dfo, to, and ho, respectively, are the original tooth diameter, the original circle diameter, the original tooth diameter, the original pitch and the original tooth height. Daf, Dof, Dff, tf and hf are the final tooth dimensions, the final section circle diameter, the final tooth diameter, the final pitch and the final tooth height. Finally, Paf and Ppf measurements are respectively the driven side profile error and the driven side profile curve.


1 Comment
Great job!